You’ve heard about the stunning beauty of the Devil’s Ivy plant and now you’re eager to bring one into your home, but how do you take care of this captivating green marvel? Look no further, as this article will guide you through all the essential tips and techniques to ensure your Devil’s Ivy thrives and flourishes. From the right amount of sunlight to watering schedules, we’ve got you covered. So, grab your gardening gloves and get ready to embark on a journey of nurturing and growing the perfect Devil’s Ivy plant.

Choosing a Devil’s Ivy Plant
Consider the location
When choosing a Devil’s Ivy plant, it’s important to consider the location where it will be placed. Devil’s Ivy can thrive in both indoor and outdoor settings, but it’s essential to choose the right spot. If you plan to keep your plant indoors, make sure it will receive sufficient light and has enough room to grow. If you’re opting for an outdoor setting, ensure the area has partial shade and protection from harsh elements.
Choose the right size
Devil’s Ivy plants can vary in size, so it’s crucial to choose one that matches the available space. If you prefer a smaller plant, look for a young Devil’s Ivy with shorter vines. Conversely, if you desire a more mature and larger plant, select one with longer vines and a fuller appearance. Consider the size of the pot or container where the plant will be placed to ensure it has ample room to grow.
Inspect the plant for pests or diseases
Before bringing home a Devil’s Ivy plant, it’s essential to inspect it closely for any signs of pests or diseases. Look for any discoloration or spots on the leaves, which may indicate the presence of pests. Check for spider mites, mealybugs, or other common pests that can harm the plant. It’s also essential to examine the plant’s roots for signs of root rot or any other disease. A healthy Devil’s Ivy plant should have vibrant green leaves and firm, white roots.
Proper Lighting
Devil’s Ivy and sunlight
Devil’s Ivy plants thrive in bright, indirect light. While they can tolerate some direct sunlight during the morning or evening hours, it’s crucial to protect them from intense midday sun. Placing your Devil’s Ivy near a window that receives filtered light or using sheer curtains can help regulate the amount of sunlight it receives. Avoid placing the plant in a location with too much shade, as it may lead to poor growth and the leaves losing their variegation.
Indoor lighting requirements
If you’re keeping your Devil’s Ivy indoors, it’s important to provide the right lighting conditions. Place the plant near a north or east-facing window, as these directions receive more indirect light. If your indoor space lacks natural light, you can supplement it with fluorescent or LED grow lights. Ensure that the lights are positioned at a suitable distance from the plant to avoid burning or overheating the leaves.
Avoiding direct sunlight
While Devil’s Ivy can tolerate some direct sunlight, prolonged exposure to intense rays can damage the leaves and hinder growth. Direct sunlight can lead to leaf scorching or browning, and it’s best to avoid such conditions. If you notice any signs of sun damage on the leaves, immediately move the plant to a more shaded area. Remember, finding the right balance of light is crucial for the optimal growth and health of your Devil’s Ivy.
Watering Needs
Finding the right balance
Watering is a crucial aspect of Devil’s Ivy plant care, but finding the right balance is essential. Devil’s Ivy prefers slightly moist soil but is susceptible to root rot if overwatered. It’s important to avoid both underwatering and overwatering the plant. Finding the sweet spot depends on various factors, such as the environment, pot size, and temperature.
Watering frequency
As a general rule, water your Devil’s Ivy when the top inch of soil feels dry to the touch. It’s better to underwater slightly than overwater, as Devil’s Ivy is more tolerant of dry conditions. Water the plant thoroughly until water drains out from the bottom of the pot, ensuring proper hydration for the roots. During the winter months, reduce watering frequency as the plant’s growth slows down.
Signs of overwatering
Overwatering can lead to root rot, which can be detrimental to your Devil’s Ivy plant. Keep an eye out for signs of overwatering, such as yellowing leaves, mushy or discolored roots, or a foul odor coming from the soil. If you notice any of these signs, adjust your watering routine immediately and allow the soil to dry out before watering again. It’s better to underwater and adjust accordingly rather than risk overwatering your plant.
Preventing root rot
To prevent root rot in your Devil’s Ivy, it’s important to ensure proper drainage. Choose a well-draining potting mix that allows excess water to flow through easily. Avoid using pots without drainage holes or pots that retain water excessively. Additionally, be cautious not to let your Devil’s Ivy sit in standing water, as it can lead to waterlogged roots. Regularly check the drainage of the pot and adjust watering practices accordingly.
Temperature and Humidity
Temperature requirements
Devil’s Ivy plants thrive in temperatures ranging from 60°F to 85°F (15°C to 29°C). They can tolerate slightly cooler temperatures but are sensitive to frost and extreme cold. It’s essential to keep your Devil’s Ivy away from drafty windows or doors during the winter months. Maintaining a consistent temperature within the recommended range will promote healthy growth and prevent stress to the plant.
Avoid extreme temperature changes
While Devil’s Ivy can tolerate a range of temperatures, it’s important to avoid sudden, drastic temperature changes. Extreme temperature fluctuations can shock the plant and lead to leaf drop or stunted growth. Keep the plant away from cold drafts, such as those caused by air conditioning units or open windows during the winter. Similarly, during the summer, ensure proper ventilation to prevent heat build-up, especially when using artificial lighting.
Ideal humidity levels
Devil’s Ivy plants thrive in moderate to high humidity levels. While they can tolerate lower humidity, it’s best to maintain a humidity level of 50% or higher to promote optimal growth. If the air in your home is dry, you can increase humidity by placing a tray of water near the plant or using a humidifier. Misting the leaves regularly can also provide a temporary increase in humidity and help prevent the leaves from drying out.
Misting the leaves
Misting the leaves of your Devil’s Ivy plant can be beneficial, especially in drier environments. Fill a spray bottle with filtered or distilled water and lightly mist the leaves, focusing on the undersides. Misting provides a temporary increase in humidity and helps keep the foliage clean from dust and debris. However, it’s important not to overdo it, as excessive moisture can lead to fungal diseases. Misting once or twice a week is generally sufficient.

Soil and Fertilizer
Choosing the right soil
When it comes to soil, Devil’s Ivy prefers a well-draining potting mix. Look for a high-quality potting mix that consists of ingredients like peat moss, perlite, and sand. These components help provide adequate drainage, allowing excess water to flow freely. Avoid using heavy clay-based soils that can retain water, as they can lead to root rot. Choosing the right soil is crucial for the overall health and growth of your Devil’s Ivy.
Enhancing drainage
To further enhance drainage, you can add materials like perlite or vermiculite to the potting mix. These additives help create air pockets in the soil, allowing water to drain more efficiently. Make sure to mix the additives thoroughly with the potting mix before planting your Devil’s Ivy. Ensuring proper drainage not only prevents root rot but also helps the plant absorb nutrients effectively and promotes healthy growth.
Feeding the plant
Devil’s Ivy plants benefit from regular feeding to ensure they receive the necessary nutrients for growth. Use a balanced, water-soluble fertilizer that is specifically formulated for houseplants. Follow the instructions on the fertilizer packaging for the correct dosage and frequency. Generally, feeding once a month during the growing season (spring and summer) and reducing or pausing feeding during the winter months is sufficient to support healthy growth.
Fertilizer types and frequency
When choosing a fertilizer for your Devil’s Ivy, opt for a well-balanced formula with equal ratios of nitrogen (N), phosphorus (P), and potassium (K). This balanced NPK ratio, such as 10-10-10 or 20-20-20, provides a comprehensive blend of essential nutrients. Fertilize your Devil’s Ivy during the growing season, typically from spring to early fall. However, always read the instructions on the fertilizer packaging for specific guidelines on frequency and dosage.
Pruning and Propagation
Maintaining the plant’s shape
Regular pruning helps maintain the shape and appearance of your Devil’s Ivy plant. As the vines grow, they can become leggy or straggly. Pruning encourages new growth and helps keep the plant bushy and compact. Trim back any excessively long or unruly vines, being careful not to remove too much foliage at once. Pruning can be done throughout the year, but the best time is during the spring or early summer when the plant is actively growing.
Pruning dead or damaged leaves
Along with maintaining the plant’s shape, it’s important to prune any dead or damaged leaves. These leaves not only detract from the overall aesthetics of your Devil’s Ivy but can also provide hiding spots for pests or diseases. Use clean pruning shears or scissors to cut away any brown or yellowing leaves, making sure to sanitize the tools between cuts. Removing dead foliage promotes the plant’s health and encourages new growth.
Propagating Devil’s Ivy
Devil’s Ivy is a great plant for propagation, as it can easily be propagated from stem cuttings. Propagation allows you to create new plants and share them with friends or expand your collection. Choose a healthy stem with at least two to three leaf nodes, and clip it just below a node using clean, sharp scissors or pruning shears. Remove the leaves from the bottom half of the stem, leaving a few leaves at the top. Place the cutting in water or a well-draining potting mix, and soon roots will develop.
Propagation methods
There are two primary methods of propagating Devil’s Ivy: water propagation and soil propagation. In water propagation, place the stem cutting in a glass or jar filled with water, making sure that at least one or two nodes are submerged. Change the water every few days to prevent stagnation and promote healthy root growth. In soil propagation, prepare a small pot with well-draining potting mix and plant the cutting, ensuring that at least one node is buried. Mist the soil lightly and keep it slightly moist as the roots develop.
Support and Training
Providing a support structure
Devil’s Ivy is a climbing vine that requires support as it grows. Provide a sturdy structure, such as a trellis, moss pole, or other supports, for the vines to cling to. Gently attach the vines to the support structure using soft plant ties or twine, being careful not to damage the stems. Regularly check the ties as the plant grows and adjust them accordingly to prevent constriction or damage to the vines.
Training the vines
To achieve a desired shape or direction, you can train the vines of your Devil’s Ivy. As the plant grows, gently guide the vines along the support structure, encouraging them to grow in the desired direction. Avoid excessive bending or twisting of the vines, as they can break or become damaged. With regular training, you can create beautiful cascading or climbing arrangements, making your Devil’s Ivy a stunning focal point in your space.
Trimming long vines
Over time, your Devil’s Ivy may produce long vines that exceed the desired length or become leggy. To maintain a compact and well-maintained appearance, trim back these long vines. Use clean pruning shears or scissors to cut the vine just above a node or leaf. Trimming encourages new growth and helps keep the plant bushy and full. Remember to sanitize the pruning tools between cuts to prevent the spread of any potential diseases.
Dealing with Common Issues
Preventing spider mites
Spider mites can be a common pest afflicting Devil’s Ivy plants. These tiny arachnids often cause fine webbing on the leaves and can lead to leaf yellowing or curling. Regularly inspect your Devil’s Ivy for any signs of spider mites. If detected, isolate the plant to avoid spreading the infestation to other plants. Treat the affected plant with a natural insecticidal soap or neem oil spray, following the instructions on the product packaging. Repeat the treatment as necessary until the infestation is eradicated.
Controlling mealybugs
Mealybugs are another common pest that can affect Devil’s Ivy. These small, white, cotton-like insects often cluster on leaf undersides or in leaf axils. They can cause leaf drop, stunting, or wilting if left untreated. To control a mealybug infestation, gently wipe the affected areas with a cotton swab dipped in rubbing alcohol or a mixture of water and dish soap. For severe infestations, consider using a natural insecticidal soap or neem oil spray. Regularly monitor your plant to catch any signs of mealybugs early and prevent their spread.
Avoiding leaf discoloration
Leaf discoloration in Devil’s Ivy can be caused by various factors, including inadequate lighting, overwatering, nutrient deficiencies, or pests. Ensuring the plant receives the right amount of bright, indirect light and watering it properly can help prevent leaf discoloration. Additionally, regularly fertilizing your Devil’s Ivy and addressing any pest issues promptly can also contribute to healthy, vibrant leaves. If necessary, consult a horticulturist or nursery professional for further guidance on diagnosing and addressing leaf discoloration.
Treating yellowing leaves
Yellowing leaves can be a sign of several issues, including overwatering, underwatering, extreme temperatures, or nutrient deficiencies. Check the moisture level of the soil and adjust your watering practices accordingly. Ensure your Devil’s Ivy is not exposed to drafty areas or extreme temperature changes. Regularly fertilize and maintain the proper nutrient balance in the soil to prevent deficiencies. If the yellowing persists or worsens, consider consulting a plant expert for further guidance on diagnosing and treating the underlying issue.
Repotting and Root Pruning
When to repot Devil’s Ivy
Repotting is an important part of Devil’s Ivy plant care and is typically necessary every 1-2 years. Signs that your Devil’s Ivy needs repotting include stunted growth, roots protruding from the drainage holes, or a crowded root system. It’s best to repot your Devil’s Ivy during the spring or early summer when it’s actively growing and has a better chance of recovering from the process.
Choosing the right pot size
When repotting your Devil’s Ivy, choose a pot that is one or two sizes larger than the current one. Avoid selecting a pot that is too large, as excessive pot size can lead to moisture retention and potential root rot. Ensure the new pot has drainage holes and use a well-draining potting mix. Gently remove the plant from its old pot, loosen the roots, and place it into the new pot, adding fresh potting mix around the roots. Firmly press the soil around the plant, and water thoroughly.
Root pruning
Root pruning can be necessary during repotting if the Devil’s Ivy has a crowded or sprawling root system. Carefully trim away any dead, damaged, or excessively long roots to encourage healthy root growth. Use clean shears or scissors to make clean cuts, and avoid removing too many roots at once. Pruning the roots helps rejuvenate the plant and stimulates new root growth. Remember to sanitize your pruning tools to prevent the spread of diseases.
Repotting steps
To repot your Devil’s Ivy, follow these steps:
- Choose a pot that is one or two sizes larger than the current pot.
- Prepare a well-draining potting mix or use a commercially available mix.
- Remove the plant from its current pot by gently loosening the roots and tapping the sides of the pot if necessary.
- Inspect the roots and prune any dead, damaged, or excessively long roots.
- Place some fresh potting mix at the bottom of the new pot.
- Position the plant in the new pot, ensuring it sits at the same height as before.
- Fill in the gaps around the roots with additional potting mix, gently pressing it down.
- Water the plant thoroughly, allowing the water to drain out from the bottom of the pot.
- Place the plant in an appropriate location with suitable lighting and temperature conditions.
Devil’s Ivy as an Indoor Plant
Benefits of Devil’s Ivy as a houseplant
Devil’s Ivy is a popular choice for indoor plant enthusiasts due to its numerous benefits. It is known for its air-purifying qualities, as it can filter and cleanse the air by absorbing harmful toxins like formaldehyde and benzene. Additionally, Devil’s Ivy is relatively easy to care for, making it an excellent choice for beginners or those with a busy lifestyle. Its trailing vines and lush foliage also make it a visually appealing addition to any interior space.
Best locations for indoor Devil’s Ivy
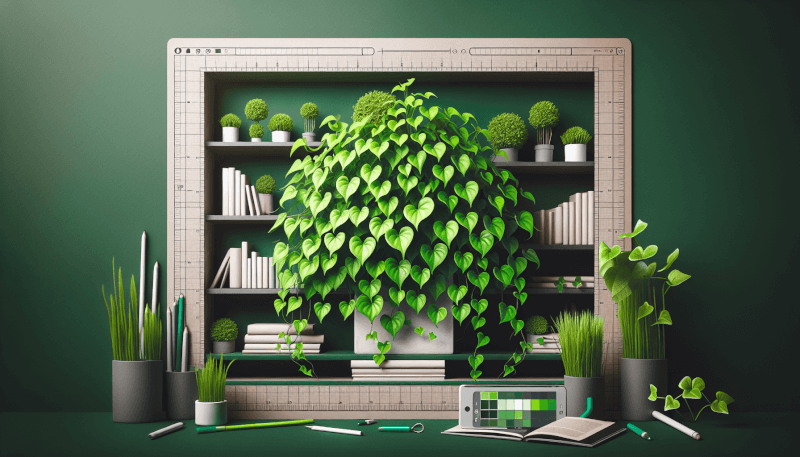
To ensure optimal growth, place your Devil’s Ivy in a location that receives bright, indirect light. North or east-facing windows are great spots, as they provide moderate levels of light without direct sun exposure. Devil’s Ivy can tolerate lower light conditions but may become leggy or lose its variegation if not provided with sufficient light. Consider placing your Devil’s Ivy as a hanging plant or on a shelf where its trailing vines can cascade down, creating a stunning display.
Tips for indoor Devil’s Ivy care
To care for your indoor Devil’s Ivy, follow these tips:
- Provide bright, indirect light for at least a few hours each day.
- Water the plant when the top inch of soil feels dry, ensuring proper drainage.
- Maintain a consistent temperature between 60°F to 85°F (15°C to 29°C) with minimal temperature fluctuations.
- Increase the humidity around the plant by misting the leaves or placing a tray of water nearby.
- Fertilize regularly during the growing season with a balanced, water-soluble fertilizer.
- Prune the plant to maintain its shape and remove any dead or damaged foliage.
- Watch out for pests like spider mites or mealybugs and treat them promptly if spotted.
- Repot the Devil’s Ivy every 1-2 years to ensure it has enough room to grow.
By following these care tips, you can enjoy the beauty and benefits of Devil’s Ivy as a thriving and attractive houseplant in your indoor space.